Prop pattern with Paint.NET
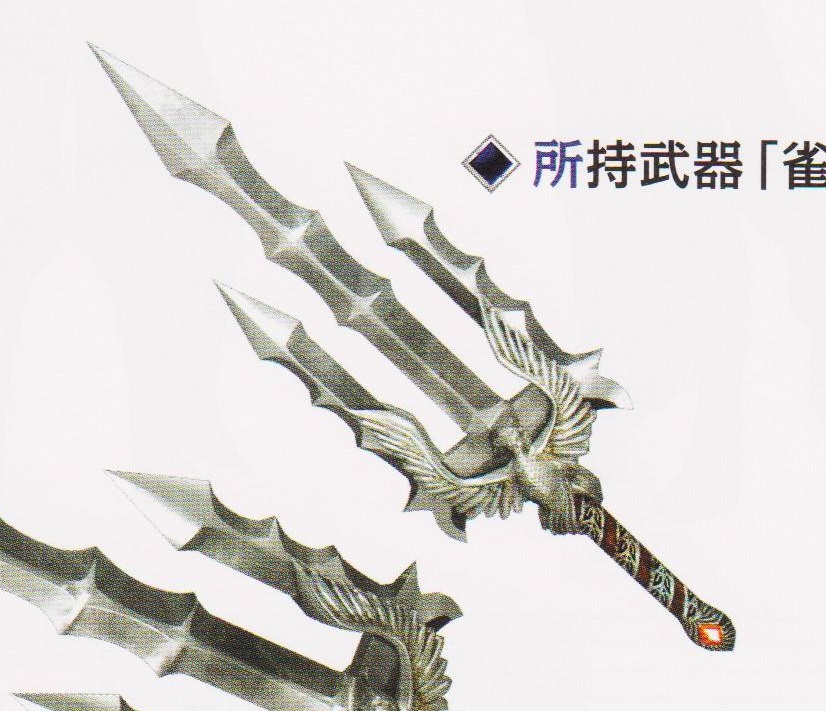
- Reference photo of your prop
- Paint.net [Paint.net is FREE here!]
- Tape Measure
- Tape, clear tape like packaging tape or scotch tape recommended
- Scissors
|
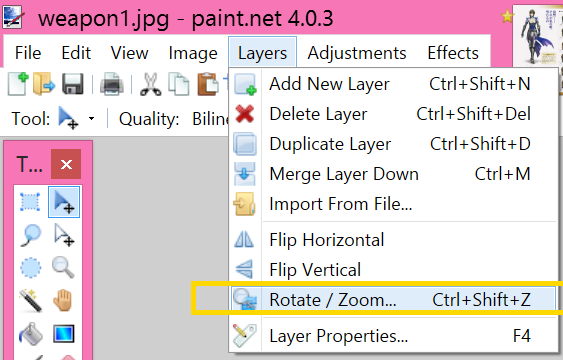
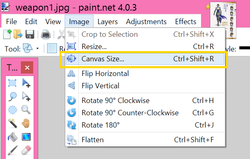
1) Open your photo in paint.net
|
|
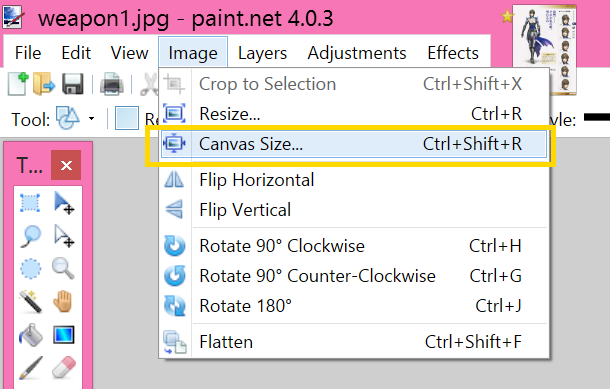
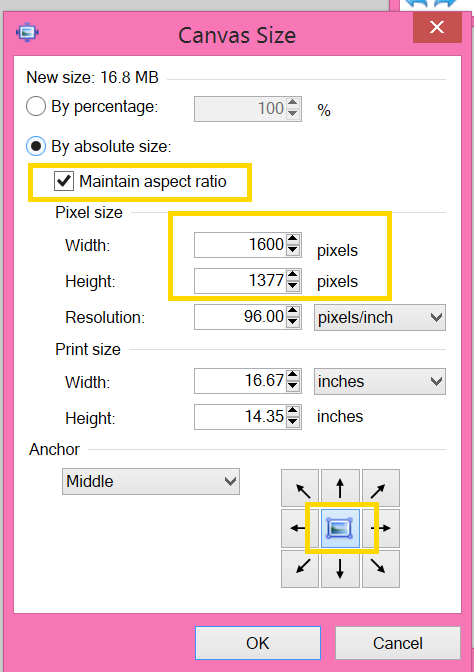
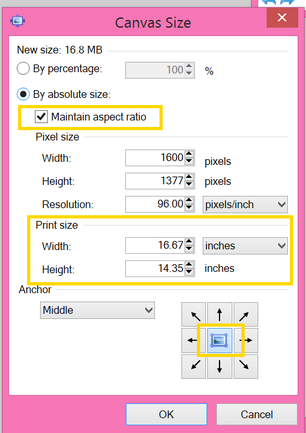
2) Expand your canvas size so when you rotate the image you dont lose part of it.. To be sure, I double the size of the canvas.
Expand the canvas using Image > Canvas Size... On the options screen, make sure Maintain Aspect Ratio is CHECKED. Make sure your Anchor is in the middle, so the extra space is added all around your image. Then change the width or the height to double [my width was about 800 so I changed it to 1600. When you tab or push OK the other dimension should automatically update. Press OK to lock in the changes. |
|
|
3) Align your prop photo so it's straight up and down.. especially if you want it to be symmetrical!
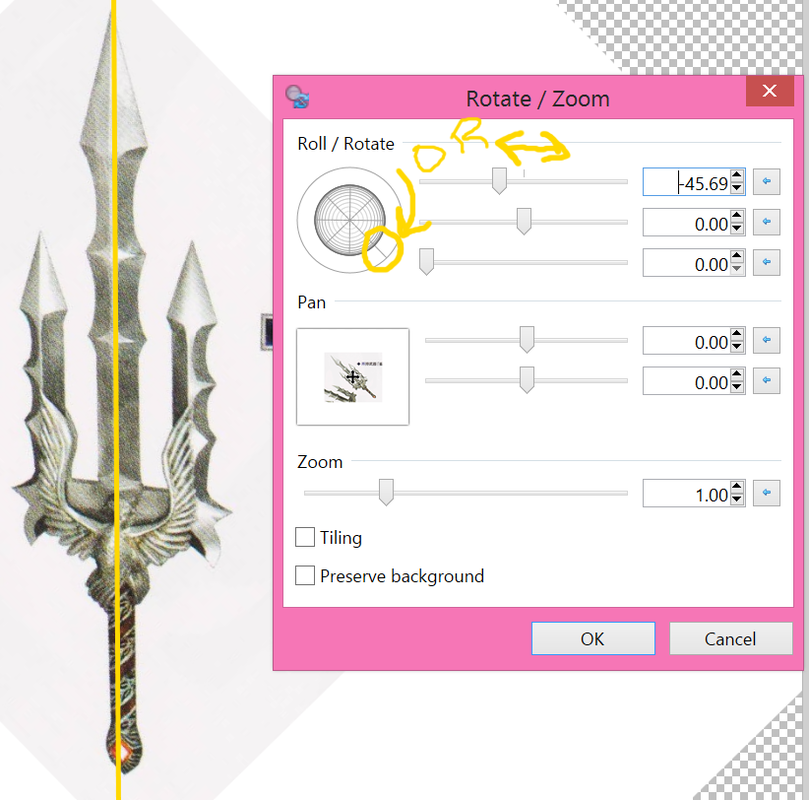
Use layers > Rotate / Zoom Use the image in the top left or use the sliding bars to rotate the image until it's straight up and down. |
|
|
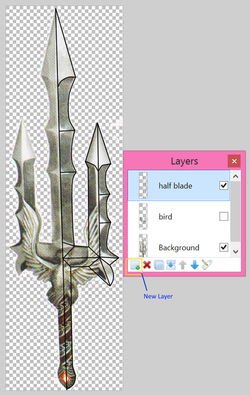
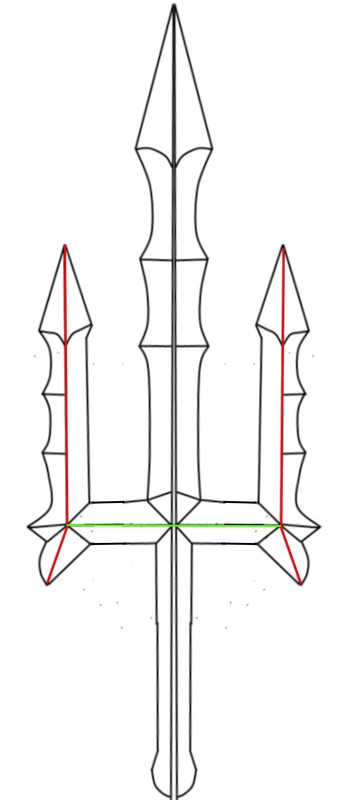
3) Add a New Layer and trace around the outside of the prop to make the outside pattern. Note: you will only need to trace half of the weapon if you want it to be symmetrical!
4) Add a New Layer and using a new color mark all of the raised edges you'll need [optional] This isn't necessary on simple props, but on more complex props it's easier to see it 3d if you color code different height areas. 5) Frequently hide the background layer so you only see your lines. Make sure none of your lines are missing! You can hide the background layer by unchecking it on the right of the layer name. You can also double click on the layer name to change it. |
|
6) Making a symmetrical item:
Select half of your trace Copy with ctrl-c or the copy icon Use image > flip horizontal Paste the image using ctrl-p or paste icon If needed, line up your half of the selection with the one already in place. If you weren't exactly vertical with the rotation on the steps above there might be a mismatch, if so, just rotate the layer into place with the same steps. Note: Making an item symmetrical with this trick ensures that both sides will have the same measurements, so it saves time AND is more accurate! |
7) Using the tape measure [or some kind of ruler] measure out how long you want your weapon to be.
In this case, the weapon was about the length of the characters arm, so I measured my own arm.
In this case, the weapon was about the length of the characters arm, so I measured my own arm.
8) Make a new, clean image if your prop with as little whitespace as possible. We're going to use re-size options to scale the item, so you don't want extra space getting resized too!
Use the selection tool and select your item. You can shave off areas of the selection by holding shift, or add areas by holding ctrl and highlighting the areas you want to remove or add.
After you have the item selected, use ctrl-c or the copy icon to copy, then make a new file. The new file will automatically size to what you have selected, push ok then paste your item in.
|
|
10) Check the proportions of the weapon and change if needed. Sometimes the new size doesn't translate as well in real life as it did in the game.
For example, you may want a shield that is the width of your arm, but when you resize it it becomes 8 ft tall! you may want to consider making it shorter for convenience.
For example, you may want a shield that is the width of your arm, but when you resize it it becomes 8 ft tall! you may want to consider making it shorter for convenience.
11) To save printing ink, you may want to use brightness / contrast options to make your lines lighter.
12) If you have the option to print without re sizing you can skip this step. If not, you can use MS Paint to get these options. Copy your image to MS Paint and print, using 100% size option. I use MS Paint to print because the print options are easier to deal with. To save paper, do print setups with landscape and portrait mode, and pick the one that uses the least paper. you can also make the margin settings '0' and they will reset to the lowest acceptable values.
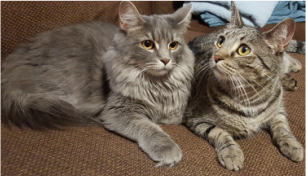
13) Print! And make sure no renegade kitties try to attack your paper :)
14) Trim edges of the paper and tape together if your item spans more than one piece of paper.
If you want to preserve the pattern, cover the paper on both sides with packaging tape before cutting it out.
If you want to preserve the pattern, cover the paper on both sides with packaging tape before cutting it out.
Enjoy your custom pattern!
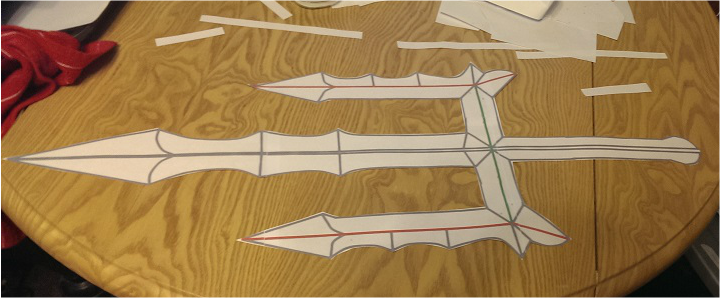
Results: